Follow Me On Social Media!


Cheese Wafers: Irresistibly Crispy and Perfect for Snacking
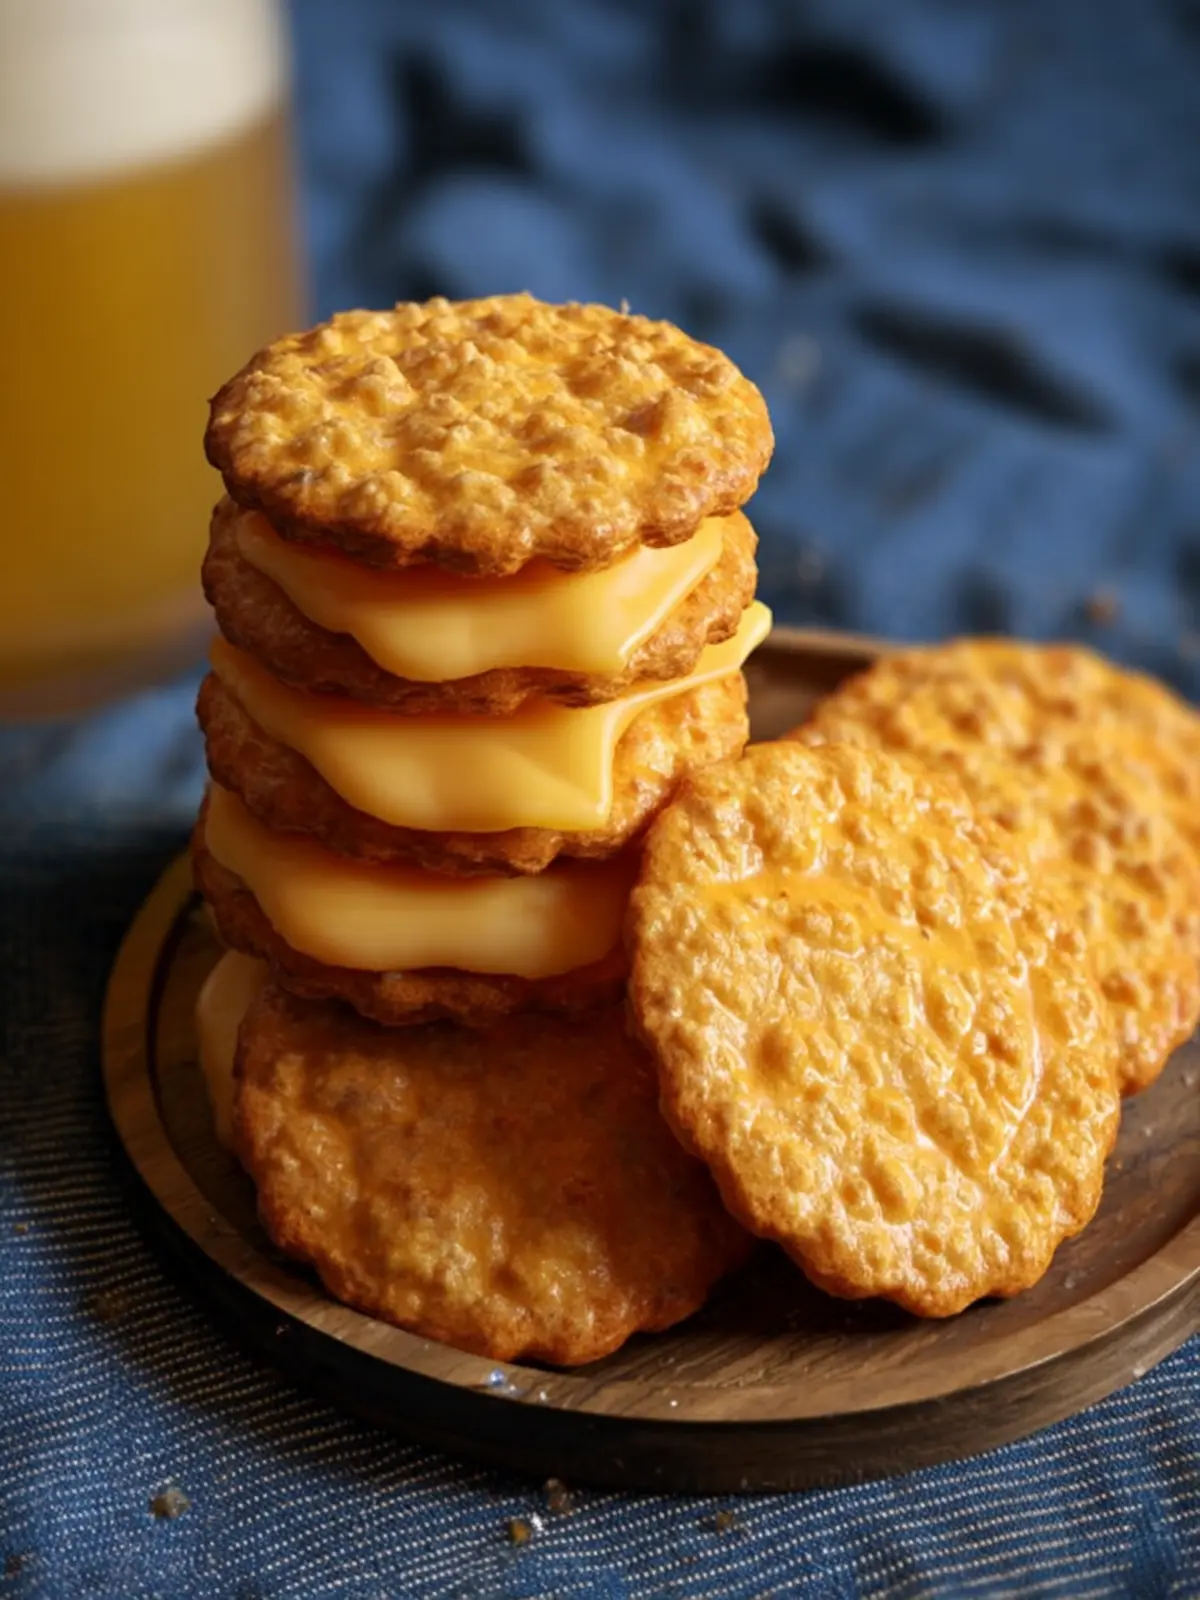
Introduction to Cheese Wafers
There’s something delightfully nostalgic about cheese wafers, isn’t there? Picture this: a cozy gathering with friends, laughter echoing, and the aroma of freshly baked snacks wafting through the air. Cheese wafers seem to magically fit into this scene, providing that perfect crunch and cheesy goodness that keeps everyone coming back for more. These delightful bites pair beautifully with everything from casual movie nights to sophisticated cocktail parties, making them the star of almost any occasion.
The beauty of cheese wafers lies not only in their taste but also in their versatility. They’re a wonderful balance of savory and satisfying, giving you that glorious cheesy experience without the heaviness often associated with larger snacks—perfect for enjoying with a refreshing beverage. Plus, they are incredibly easy to make, allowing you to whip up a batch in no time.
What makes cheese wafers a perfect snack?
In addition to their flavor, the texture of cheese wafers is a game changer. Their crispy exterior contrasts beautifully with their slightly tender interior, creating a satisfying bite that can keep you nibbling. The hint of sharpness from the cheese in every crunch creates a savory symphony of flavors that will leave you wanting just one more. Here are a few reasons why cheese wafers shine as a top choice for snacking:
-
Convenience: Ideal for a quick snack or an appetizer at gatherings, cheese wafers can be made ahead of time and stored. Just pop them in the oven when you need them for an instant treat.
-
Customization: The recipe is incredibly adaptable. Whether you prefer a sprinkle of herbs, a dash of hot sauce, or even a hint of garlic, cheese wafers can accommodate a variety of tastes. Feel free to experiment!
-
Nostalgic Appeal: There’s a sense of love in homemade cheese wafers. They remind us of enjoyable moments spent in the kitchen with family or friends, often evoking warm memories that make sharing them even more special.
So, whether you’re looking to elevate your next event or simply satisfy a cheese craving, cheese wafers are here to impress!

Key Ingredients for Cheese Wafers
Creating cheese wafers at home is an adventure you won’t soon forget, especially when you learn about the ingredients that make these crunchy delights incredibly irresistible.
-
Cheese: The star of the show! I recommend using sharp cheddar for its robust flavor, but feel free to mix in other cheeses like Parmesan or Gruyère to elevate the taste even further. The more flavorful your cheese, the more delicious your wafers will be.
-
Butter: Essential for that delightful richness, I use unsalted butter. It not only adds flavor but also helps achieve that perfect flaky texture. Make sure it’s softened; cold butter will make it hard to blend smoothly with other ingredients.
-
Flour: All-purpose flour works beautifully in this recipe. It provides the structure. If you’re considering gluten-free options, a 1:1 gluten-free blend can also work, but I recommend checking for brands that mimic all-purpose great in baking.
-
Cayenne Pepper: This is my secret weapon for a subtle kick! Just a pinch can transform your cheese wafers from ordinary to extraordinary, so don’t skip it unless you really prefer a milder flavor.
-
Salt: A touch of salt enhances all the flavors in your cheese wafers. This is especially important if you’re using unsalted butter; it helps to balance everything perfectly.
Understanding these key ingredients not only empowers your baking skills but also turns a simple recipe into a memorable treat for friends and family. Happy baking!
Why You’ll Love This Recipe
When you bite into these cheese wafers, you’re not just savoring a snack; you’re indulging in a warm, buttery tradition that has been loved for generations. Perfectly crispy on the outside and delightfully cheesy within, they have the magical ability to turn any gathering into a memorable celebration.
Here’s what makes these cheese wafers stand out:
-
Simple Ingredients: The recipe calls for basic pantry staples, making it easy to whip up a batch whenever the craving strikes. This flexibility means you can enjoy them at a moment’s notice, whether it’s a quiet evening or a lively gathering.
-
Versatile Treat: These wafers pair well with a variety of dips, soups, or even a glass of wine. You can serve them as an appetizer or a delightful snack, and they’re sure to impress your friends and family.
-
Customizable Flavor: Want to jazz them up a bit? Feel free to experiment with different cheeses or spices to make them uniquely yours.
-
Real Nostalgia: Each bite takes you back to cozy family gatherings and festive occasions where laughter and good food fill the air.
Ultimately, these cheese wafers aren’t just a recipe; they’re an invitation to create new memories while enjoying comforting flavors. What could be better than that?
Variations of Cheese Wafers
The delightful world of cheese wafers isn’t confined to a single flavor or texture. These crispy morsels can be easily customized to suit a variety of tastes, transforming a simple recipe into a gourmet experience. Imagine snacking on a cheese wafer that not only satisfies your cravings but also surprises your palate!
Spicy Cheese Wafers
For those who crave a little heat, consider adding cayenne pepper or red pepper flakes to the dough. This tweak will infuse your cheese wafers with a warm, spicy kick that pairs beautifully with a cool dipping sauce, like ranch or a classic creamy queso.
Herb-Infused Cheese Wafers
Why not elevate your cheese wafers by incorporating fresh herbs? Chopped rosemary, thyme, or even basil can introduce a world of fresh flavors. This variation makes for a fantastic addition to a charcuterie board, providing a fragrant, savory crunch.
Nutty Cheese Wafers
Crushed nuts can bring an exquisite texture and flavor contrast to your cheesy snacks. Almonds, walnuts, or pecans can be mixed directly into the dough or sprinkled on top. This variation not only enhances the taste but also adds an appealing crunch.
Sweet Cheese Wafers
On the sweeter side, try incorporating a touch of honey or black pepper. This unexpected combination will give your cheese wafers an alluring sweetness that contrasts perfectly with the salty cheese, making them a unique treat for any gathering.
Exploring these variations will turn your cheese wafers into a delightful melody of flavors that everyone will enjoy!
Cooking Tips and Notes for Cheese Wafers
Creating perfect cheese wafers is about balance and a touch of creativity. The beauty of these snacks lies in their simplicity, yet the right adjustments can elevate your experience. Here are some tips to guide you through the process.
Cheese Selection Matters
For the best flavor, opt for a sharp cheddar cheese. It adds a robust taste that makes your cheese wafers irresistibly savory. If you want a milder flavor, feel free to mix in some mozzarella for a creamier texture. Remember, freshly grated cheese melts better than pre-packaged shredded varieties.
Keep It Cold
Chilling your dough is crucial. Not only does it help maintain the wafer’s shape, but it also enhances the flavor as the spices meld during refrigeration. Aim for at least 30 minutes in the fridge before rolling out.
Perfect Piping
If you’re piping your cheese wafers, keep your pastry bag nozzle relatively small. This allows for a nice, controlled flow, giving you that classic, delicate shape. If the dough feels sticky, a light dusting of flour on your hands and work surface can help.
Baking Tips
Always preheat your oven for a full 10 minutes before baking. Even, hot air ensures that your cheese wafers crisp up nicely. Keeping an eye on them while baking is essential; they can go from perfectly golden to overcooked in a matter of seconds.
With these straightforward tips, your next batch of cheese wafers will surely impress friends and family alike! Happy baking!

Serving Suggestions for Cheese Wafers
There’s nothing quite like savoring cheese wafers at any gathering; they manage to elevate ordinary moments into delightful experiences. These crispy, cheesy delights can be served in countless ways, adding not just flavor, but also a hint of elegance to your table. Here are a few creative serving ideas to make your cheese wafers shine:
Perfect Pairings
-
Wine: Pair your cheese wafers with a light white wine, like Sauvignon Blanc or a sparkling Prosecco. The acidity and bubbles nicely complement the richness of the cheese, enhancing the overall taste.
-
Charcuterie Board: Include cheese wafers as a crunchy element on your charcuterie board. Mix them with cured meats, assorted cheeses, olives, and seasonal fruits for a vibrant and inviting spread.
-
Dips and Spreads: Try serving cheese wafers alongside fresh dips. A creamy spinach dip or tangy roasted red pepper hummus can take your snack experience to the next level.
Casual Gatherings
For a laid-back get-together, place a bowl of cheese wafers on the coffee table with a selection of craft beers. Guests will love munching on these bites while sharing laughs and stories.
Elegant Presentations
For a more formal brunch or dinner party, serve cheese wafers as appetizers on individual small plates, garnished with sprigs of fresh herbs or a slice of cured meat. This presentation adds a touch of sophistication that’s sure to impress your guests.
No matter how you choose to serve them, cheese wafers are bound to be a hit, bringing warmth and deliciousness to your occasion.
Time Breakdown for Cheese Wafers
Creating the perfect cheese wafers is not only rewarding but also relatively quick! Below is a simple breakdown of the time you’ll need, ensuring you can plan accordingly for those delightful cheesy snacks.
Preparation Time
To get started, you’ll spend about 20 minutes preparing your ingredients. This includes grating the cheese and mixing it with your flour and spices, which sets the stage for a flavorful wafer.
Baking Time
Once your dough is ready, baking the cheese wafers takes about 15 minutes. You’ll know they’re done when they turn a lovely golden brown.
Total Time
In just 35 minutes, you can have fresh and crispy cheese wafers ready to enjoy! This makes them a fantastic choice for an impromptu gathering or a cozy night in.
Nutritional Facts for Cheese Wafers
When indulging in the delightful crunch of cheese wafers, it’s essential to savor not just the flavor but also the nutritional breakdown. These bite-sized treats provide a satisfying balance of taste and nutrition that complements any gathering.
Calories
Each serving of cheese wafers typically contains around 100-120 calories, making them a great snack option for those mindful of their caloric intake while still wanting to enjoy something flavorful.
Protein
One of the standout features of cheese wafers is their protein content, thanks to the cheese used in the recipe. Expect approximately 3-5 grams of protein per serving, helping to keep you fuller for longer and providing a boost of energy.
Sodium
While delicious, cheese wafers can be a bit high in sodium, with about 200-250 mg per serving. It’s wise to enjoy them in moderation, especially if you’re watching your salt intake, but don’t worry—when enjoyed as part of a balanced diet, they can be a fun addition to your snack repertoire!
FAQs about Cheese Wafers
Exploring the world of cheese wafers opens up a delicious realm of crunchy treats that are perfect for any occasion. Here, we tackle some common questions to make your cheese wafer-making experience even better!
How do I make cheese wafers crispy?
The secret to achieving perfectly crispy cheese wafers lies in the baking time and temperature. Ensure you roll your dough thinly; thicker wafers will take longer to bake and may end up chewy instead of crispy. Baking them at a higher temperature (around 375°F) allows for a quick crisping action. Keep an eye on them and remove them from the oven as soon as they are golden, as they continue to crisp up a bit once cooled.
Can I use a different type of cheese?
Absolutely! While sharp cheddar is a classic choice for cheese wafers, feel free to experiment with other cheese varieties. For a milder flavor, try mozzarella or Colby Jack. For something more pungent, gouda or blue cheese can add a unique twist. Just remember that the moisture content and flavor intensity will vary between cheeses, so adjust the quantity accordingly for the best results.
How should I store leftover cheese wafers?
If you have any cheese wafers left (and that’s a big “if”!), it’s best to store them in an airtight container at room temperature. This will help maintain their crisp texture. To avoid any moisture build-up, consider placing a piece of parchment paper in the container. If you want to enjoy them later, you can re-crisp them in the oven for a few minutes before serving. Enjoy your cheesy delights!
Conclusion on Cheese Wafers
In the world of cheese wafers, everything comes together beautifully: the crunch, the flavor, and the delightful aroma fill your kitchen with warmth and charm. These little bites are not just snacks; they can elevate any gathering, whether you’re hosting a casual game night or a sophisticated cocktail party. Remember, the key to perfecting your cheese wafers lies in selecting quality ingredients, especially your cheese and seasonings. With a bit of practice, you’ll master these tasty treats, leaving your friends and family eagerly asking for the recipe. So go ahead, dive into this cheesy adventure, and enjoy every crispy bite!
Print
Cheesy Rice Krispies Balls
- Total Time: 30 minutes
- Yield: 24 balls 1x
- Diet: vegetarian
Description
Delicious cheesy snacks made with Rice Krispies and a hint of spice.
Ingredients
Scale
- 2 cups sharp cheddar cheese (shredded)
- 1/2 cup butter (softened)
- 1 tablespoon Worcestershire sauce
- 1 cup all purpose flour
- 1 cup Rice Krispies cereal
- 1 tablespoon granulated garlic
- 1/2 teaspoon kosher salt
- 1/2 teaspoon cayenne pepper (or more to taste)
Instructions
- Preheat oven to 375°.
- Add shredded cheese, butter, Worcestershire sauce, flour, Rice Krispies, garlic, cayenne pepper and salt to a large mixing bowl.
- Mix together with clean hands or a wooden spoon until dough comes together into a ball.
- Scoop into one inch balls and place on a parchment lined baking sheet about 2 inches apart.
- Bake for 15 minutes.
- Remove to a wire rack to cool completely.
- Store in an airtight container up to 1 week.
Notes
- For an extra kick, adjust the cayenne pepper to taste.
- Prep Time: 15 minutes
- Cook Time: 15 minutes
- Category: snacks
- Method: baking
- Cuisine: American
Nutrition
- Serving Size: 1 ball
- Calories: 150
- Sugar: 1g
- Sodium: 150mg
- Fat: 10g
- Saturated Fat: 6g
- Unsaturated Fat: 3g
- Trans Fat: 0g
- Carbohydrates: 12g
- Fiber: 0g
- Protein: 4g
- Cholesterol: 30mg